


Detailed Giani Countertop Paint instructions to help you transform even the most basic countertops into something beautiful and new!
If you’re stuck with ugly countertops, don't want to break the bank, and don't know what to do to fix it, boy do I have an amazingly affordable solution for you!
What if I told you that you can get new countertops, without actually going out and buying new countertops?
Let me explain….
With Giani Granite Countertop paint you can makeover your countertops to look like granite if they aren’t. Or even update the design of granite countertops you don't love. The latter was my situation.

The awesome people at Giani offered to send me the paint kit to share how it works and the outcome with you guys.
Yup! If I can do it, trust that you can do it too!
And the best part is it won’t take a bunch of time. AND even more important is it won’t take a bunch of money either!
Giani Granite is a granite countertop DIY makeover solution.
What Types of Countertops Can Giani Granite Be Used On?
Despite its name, it is not only made for use on granite. One of the biggest questions I get is “can Giani Granite be used on my countertops?”.
So I have listed what Giani Granite can be used on.
- Wood
- Metal
- Marble
- Granite
- Concrete
- Formica
- Laminate
- Primed Plastic
Full Giani Countertop Paint Instructions
With Giani Granite countertop paint you can give your countertops a new, fresh makeover in 3 days or less, with 3 very easy steps.
Now let me say that is NOT including the prep work. So let’s start with that, right after I give you the additional materials list.
Materials Needed For your Giani Application
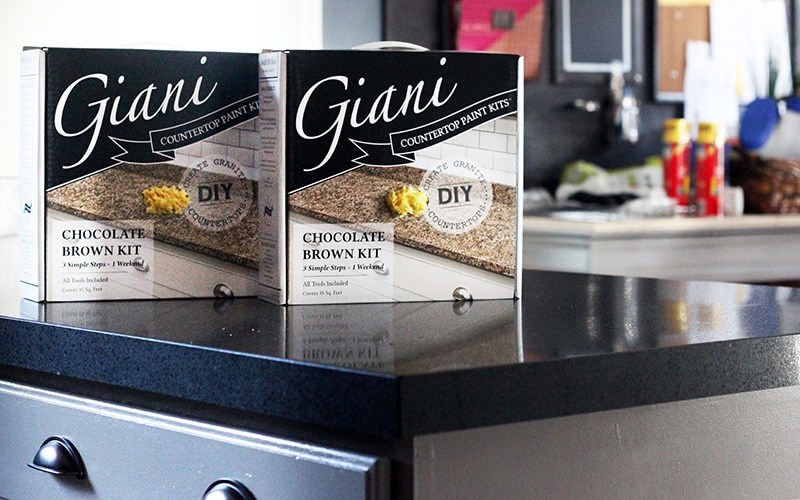
I used the Giani Granite Chocolate Brown kit, there are several others that you can choose from. I have linked them here.
- Paint tray
- Paint tray liner (optional)
- Frog Tape (or regular painters tape)
- Scissors
- Xylene or Lacquer thinner
- Rubbing alcohol
- Paper plates
- Lamb Wool Stain Applicator
- #600 Grit Sandpaper
All other materials needed are included in the Giani Kit.

Prepping Your Countertops For Your DIY Makeover
The prep work varies based on the material group listed below. Read through the instructions for the group that applies to your countertop material.Group 1 Materials
Wood
Metal
Marble
Group 2 Materials
Granite
Concrete
Group 3 Materials
Formica
Laminate
Primed Plastic
Group one prep instructions
These materials require that you degloss. And you can do that with the #600 grit sandpaper. Then clean with a damp cloth without any additional cleaners.
For unsealed wood, it is recommended that you apply a good wood primer using a foam roller to ensure no texture is added to the surface and allow for a smooth finish when complete.
And then continue with instructions for all groups.
Group two prep instructions
Granite and concrete that are fully cured require that you clean the surface with xylene or lacquer thinner. Making sure to follow the instructions for use of the product that you are using.

Once complete, wipe the surface with rubbing alcohol to ensure any wax or sealer is removed.

Continue with instructions for all groups.
Instructions for all groups
Remove all caulking with a box cutter and clean any residue left behind with rubbing alcohol.
Use a Brillo or SOS pad to remove all grease and dirt. Clean using only water, at least two times, to fully clean countertops.
Patch any deep nicks and scratches with wood filler iif needed. Once the wood filler is dry, sand the wood patch with a #600 fine grit sandpaper. Wipe the dirt and residue with a damp cloth. No cleaners!
Tape the edges of your work surface to prevent overpainting and making a mess on unintended spaces. Cover cabinets to prevent spills.

Now that we got the prep work out of the way, on to the three easy steps.
How To Makeover Your Countertops Using Giani Granite Countertop Kit
Granite Countertops DIY Broken Into Easy To Follow Steps
Prime the Countertop to prepare for Giani Application

In this step, you use the provided rollers and primer to thoroughly cover the countertops.
Materials for each step are labeled accordingly.
I recommend shaking the primer can up good before opening it.

Starting with the backsplash and use the roller to cover two-foot sections with primer. Move to the countertop using the same steps. Applying a thin coat.
Per the instructions, you work in two-foot sections and try to avoid overlap lines. And then you have to wait 8 hours for the primer to dry before moving to the next step.
Clean your roller disposing of the roller cover.
Applying The Giani Granite Minerals
Cut your sponge in half, and then cut each half in half. You can see what I mean in the video. Doing this will leave you with four fairly equal sponge pieces.
After all pieces are seperated rub each of the sponge pieces and shake them to remove any debris from the sponges.
Pour a small amount of each mineral color on its own paper plate.

Practice the application on the black sheet in the kit before starting on your actual countertops. This allows you to get a feel for what you will be doing on the countertops. I strongly recommend that you don’t skip this step.
Starting with mineral 2a, the middle shade between the three, begin by dabbing (softly, not blotting) on the surface. This is also done in 2×2 foot sections.

Allowing the black primer to show through.
While 2a is still wet, you can go ahead and apply 2b to the section.
The minerals blend best if this step is done while the last one is still wet.
Apply 2b, the darker brown, using the same motion over 2a. Once complete, move on to 2c, the lightest of the three colors.
Once all three colors are complete use the last sponge piece, with nothing on it, to dab over the paint and blend it together. Using the dry sponge dab over the area in the same way you did during paint application.
After doing all three colors and then dabbing with the dry sponge, I went through with 2a and 2b to lighten the tone a little. My personal preference.
Everyone’s preferences will be different.
Then, when each 2×2 section is complete, you can move to the next section until the entire counter, edges, and backsplash are fully covered.
I love painting. To me, it is therapeutic, so the time flew by.

I went through and did the flat surface first and then did the edge. This was so that I didn't mess up the edge while trying to reach parts of the countertop.
After I had completed all of the layers, I allowed for a drying time of 4 hours.
Once it dried, I used #600 grit sandpaper to sand down and smooth the surface.

I used a #400 because my hardware store didn't have #600. I wiped the block in a very light motion across the countertop to smooth the surface. And then wiped the counter with a damp cloth to remove all the dust from sanding.
Protect Your Faux Granite Countertops
Like the others, shake the can of topcoat before opening.
In this step, you use the provided roller and topcoat to thoroughly cover the countertops. And continue with the working in two-foot sections to try to avoid overlap lines.
I recommend that you do at least 2 coats but no more than three of the protective finish.
Once complete, allow drying for at least an hour. And then remove the tape. It’s always a good idea score the tape each with a blade to avoid the paint peeling off and slowly pull tape upwards.
My tips from my experience using Giani Granite countertop paint kit
- Be sure to move appliances, like your stove and fridge, to allow even application along all edges before starting.
- Use dedicated cleaning rags to avoid contaminating the space.
- When painting, use fitted gloves to help make clean up a breeze. I do this for almost everything.

- Do not allow anything to touch your countertops between steps to avoid introducing substances or dirt on the surface.
- Have a damp rag handy in case paint gets somewhere it shouldn’t. For me, it was the cabinets and floor. As we did not cover the cabinets and we dropped paint on the floor a couple of times.
- I applied the first coat of topcoat with the roller. It streaked. So I went and got a lambskin tool like this one here to give it a more even finish for the last two coats.


Granite Countertop DIY Using Giani Granite Project
Materials
- Paint tray
- Paint tray liner, optional
- Frog Tape, or regular painters tape
- Scissors
- Xylene or Lacquer thinner
- Rubbing alcohol
- Paper plates
- Lamb Wool Stain Applicator
- #600 Grit Sandpaper
Instructions
PREPING
Group one materials
- Degloss with a #600 grit sandpaper. Clean with a damp cloth without any additional cleaners.
- For unsealed wood, it is recommended that you apply a good wood primer using a foam roller to ensure no texture is added to the surface and allow for a smooth finish when complete.
- Continue with instructions for all groups.
Group two materials
- Granite and concrete that are fully cured require that you clean the surface with xylene or lacquer thinner. Following the instructions for use of the product that you are using.
- Once complete, wipe the surface with rubbing alcohol to ensure any wax or sealer is removed.
- Continue with instructions for all groups.
All groups
- Remove all caulking with a box cutter and clean any residue left behind with rubbing alcohol.
- Use a Brillo or SOS pad to remove all grease and dirt. Clean using only water, at least two times, to fully clean countertops.
- Patch any deep nicks and scratches with wood filler. Once the wood filler is dry, sand the wood patch with a #600 fine grit sandpaper. Wipe the dirt and residue with a damp cloth. No cleaners!
- Tape the edges of your work surface to prevent overpainting and making a mess on unintended spaces. Cover cabinets to prevent spills.
APPLICATION
- Prime
- Shake the primer can well before opening.
- Starting with the backsplash, use the roller to cover two-foot sections. Move to the counter using the same steps. Applying a thin coat.
- Working in two-foot sections try to avoid overlap lines.
- Wait 8 hours for the primer to dry before moving to Step 2.
- Clean your roller disposing of the roller cover.
- Apply Giani Granite Minerals
- Cut your sponge in half, and then cut each half in half. Leaving you with four fairly equal sponge pieces.
- Rub and shake each sponge to remove any debris from the sponges.
- Pour a small amount of each mineral color on its own paper plate.
- Starting with mineral 2a begin by dabbing (softly, not blotting) on the surface. Again this is done in 2×2 foot sections. Allowing the black primer to show through.
- While 2a is still wet apply 2b to the section as the minerals blend best of done while still wet. Apply 2b using the same motion over 2a. Once complete, move on to 2c.
- Once you have done all three colors use the last sponge piece to dab over the paint and blend. Using the dry sponge dab over the area in the same manner.
- Once each 2×2 action is complete, move to the next section until the entire counter, edges, and backsplash are covered.
- Allow drying for 4 hours.
- Using #600 grit sandpaper, sand down and smooth surface. Wipe with a damp cloth and let dry.
- Protect
- Shake the can of topcoat before opening.
- In this step, you use the provided roller and topcoat to thoroughly cover the countertops.
- Working in two-foot sections try to avoid overlap lines.
- It is recommended that you do at least 2 coats but no more than three.
- Once complete, allow drying for at least an hour.
- Remove tape. To avoid paint peel-off score the tape each with a blade and slowly pull tape upwards.
How can you make it look like marble with Flowing effect instead of the speckled granite?
Hey Diane! I am not sure since we didn’t go that route. I don’t want to give wrong info.