
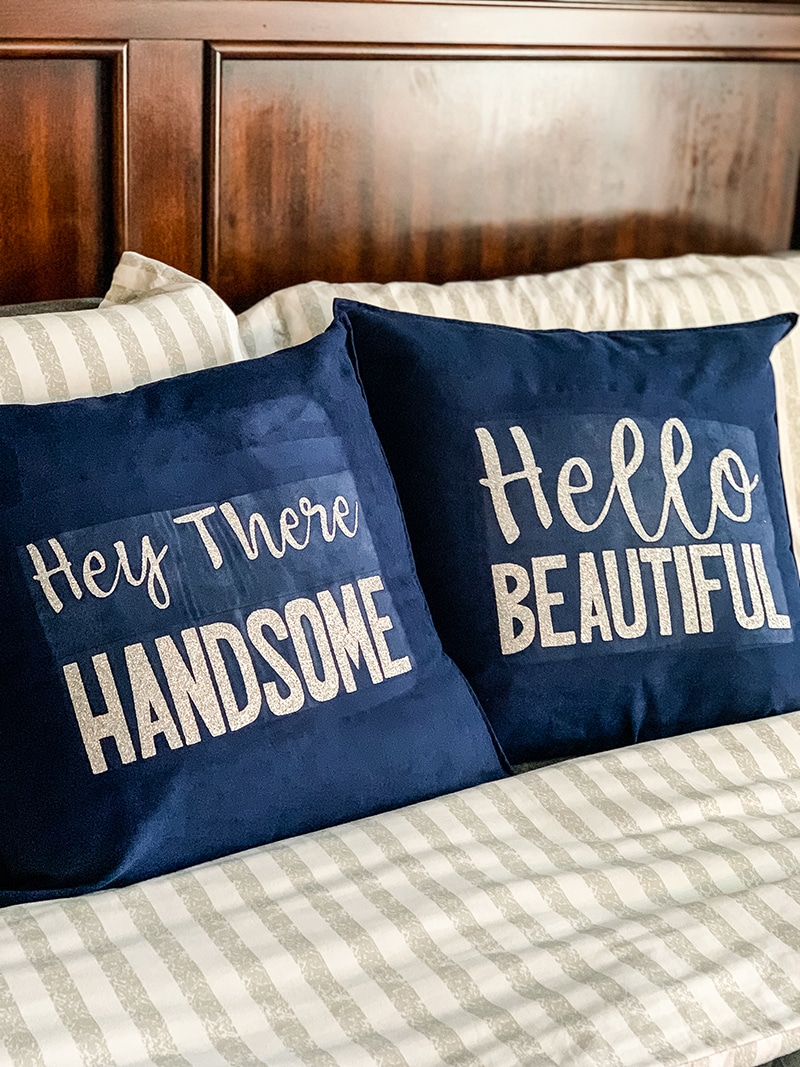
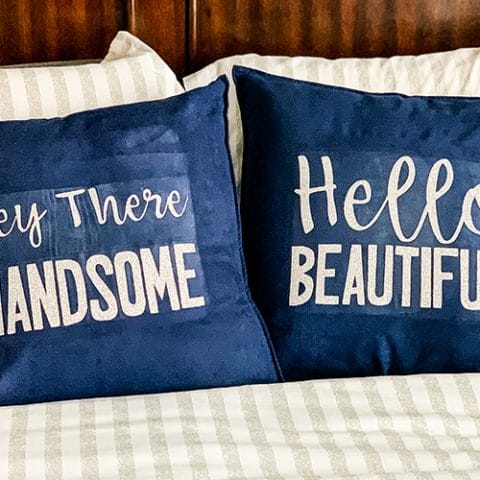
How To Make a Beginner Throw Pillow Design Using The Cricut Explore Air 2 & EasyPress 2
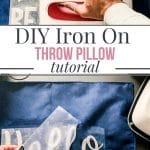
An easy enough DIY Iron On Pillow project using the Explore Air 2 and the Easy Press 2 from Cricut.
The links in this post may be affiliate links. That means that if you click them and make a purchase, this site makes a commission. It will have no impact on the price you pay or the experience of your purchase.
This is a sponsored conversation written by me on behalf of Cricut. The opinions and text are all mine.
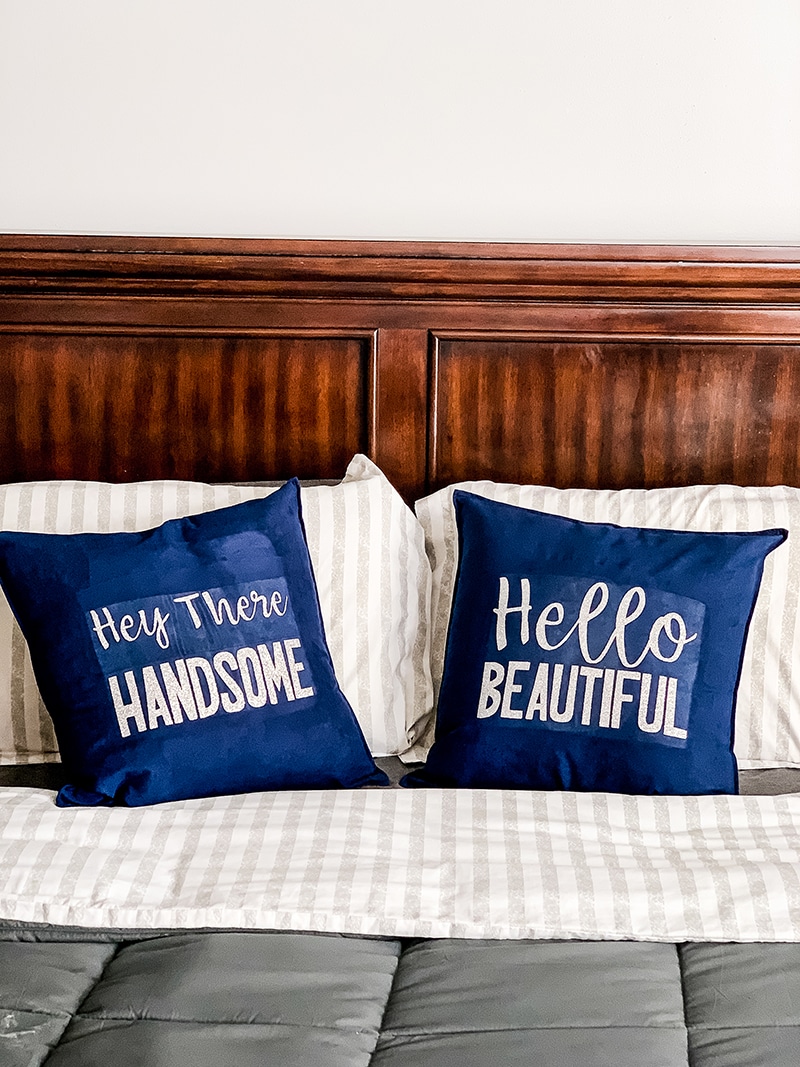
You can never have too many throw pillows. And seeing how my bedroom has none, as of recently, it seemed to be the perfect project to test out my new Cricut goodies.
*insert my husband’s joy*
He’s been around for a while but still can not, for the life of him, understand why we have to have so many darn pillows, especially if we are not allowed to sleep on them.
But these are mysteries that men are not supposed to be able to solve. So he’ll be alright.
Before now, I would buy pillows. Repurpose them. And sometimes even get rid of them. But now, I can make pillows which means there will be more pillows – kinda.
Now I can just make the pillowcases and swap out the inserts. And this part, my husband should really love, cause the covers can just be folded up and store in the closet without taking up too much space.
This is good yall. Real GOOD!
Right now, I am on my Bambi legs in the Cricut game, but watch out world, I am gonna be a beautiful deer soon. Running wild and free, making all of the things. Y’all ain’t ready.
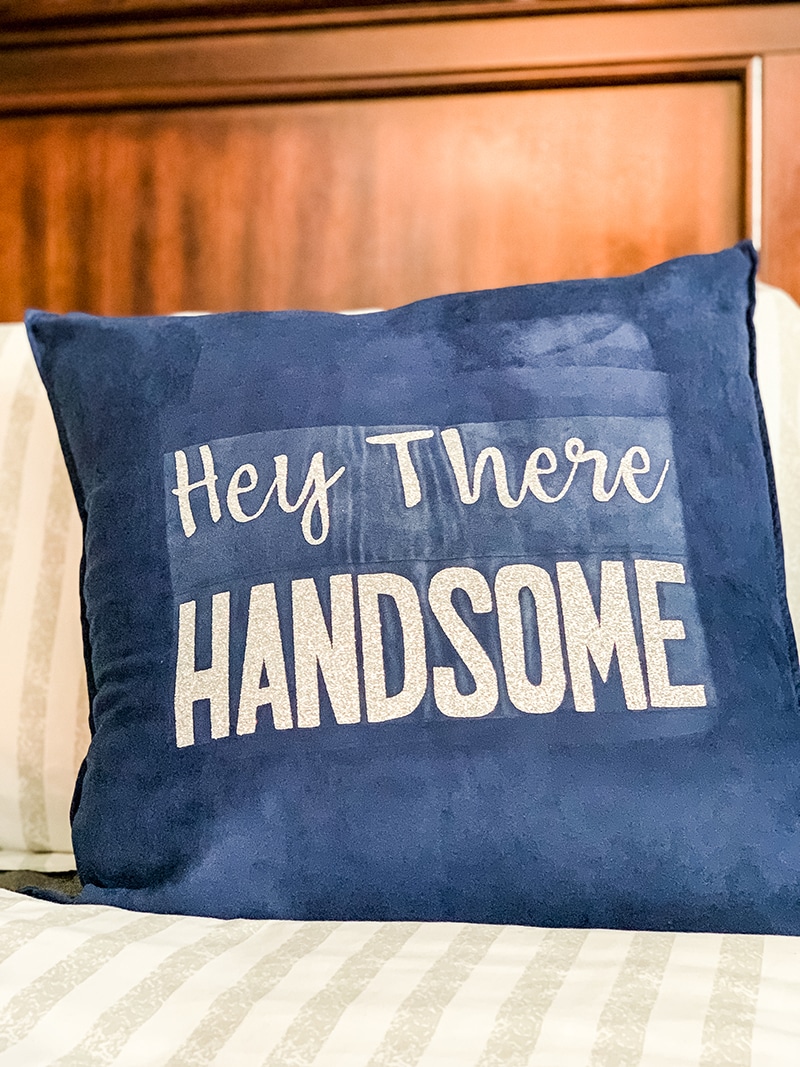
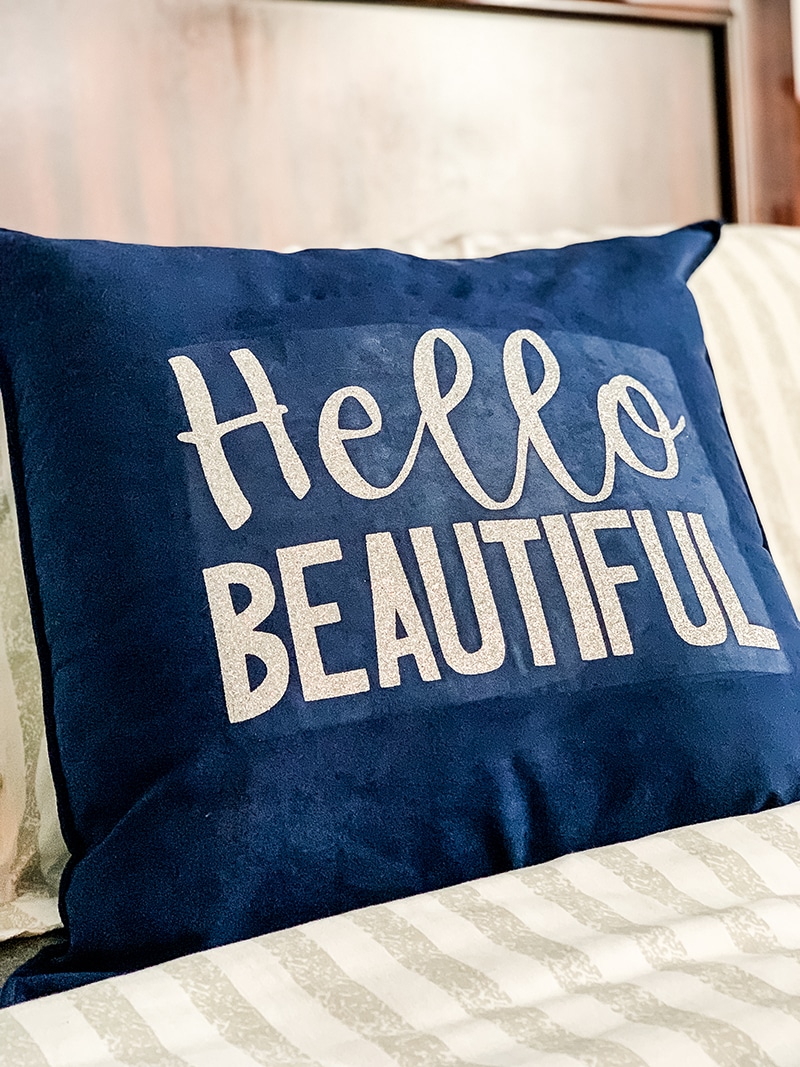
I’d like to show you how I made these using the Cricut Design Space, with my Explore Air 2, and finished the project with the Easy Press 2 to put the design on the actual pillow covers.
Materials Need to Make Hey There Handsome and Hello Beautiful Throw Pillows
Cricut Design Space
Design Space is the software needed to bring all your Cricut designs to life.
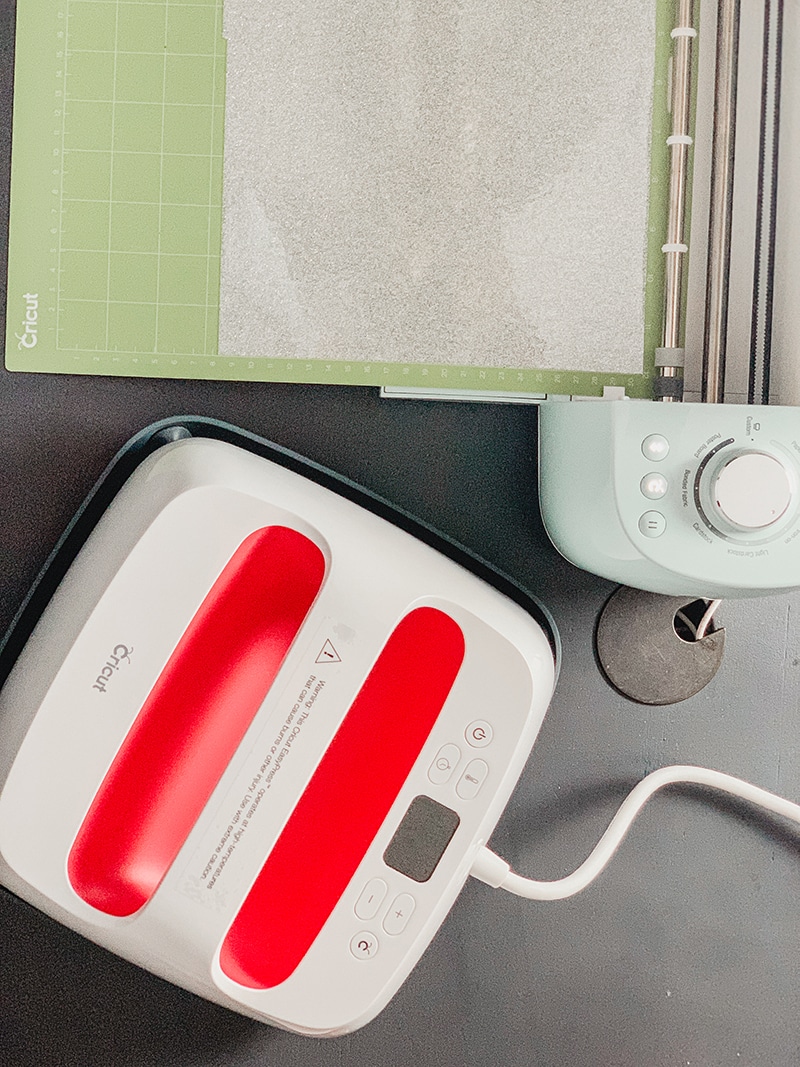
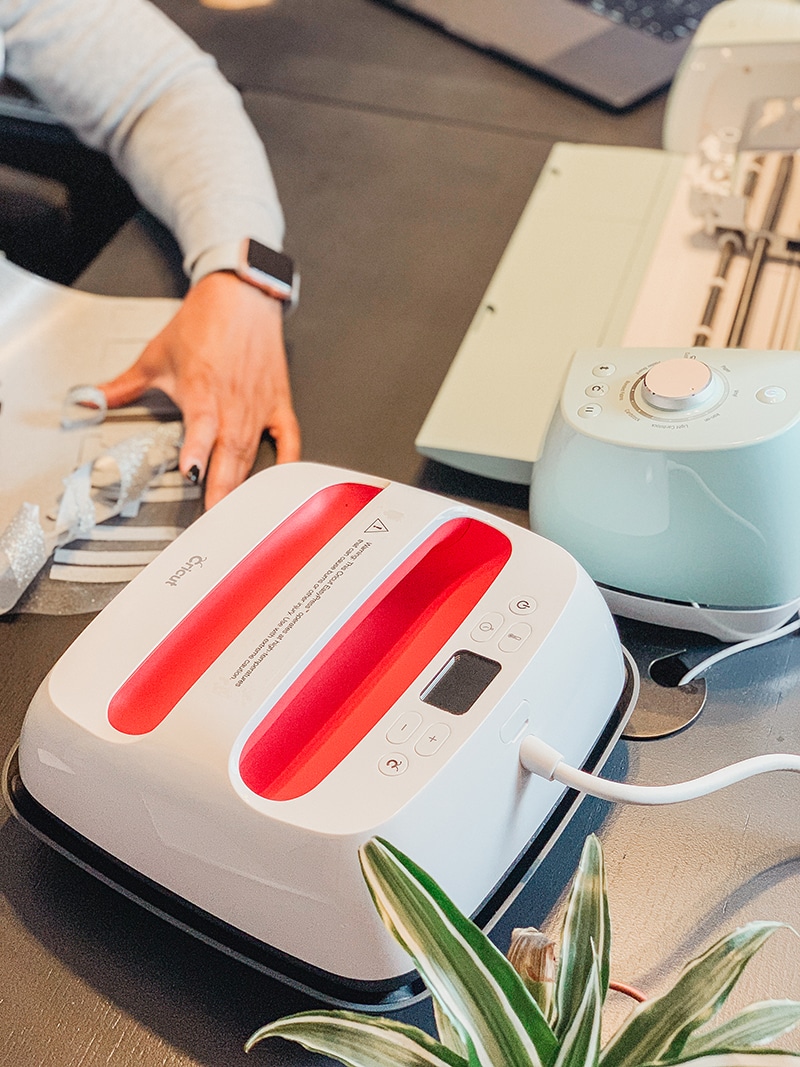
Cricut Explore Air 2
There are other machines that can be used to do the same thing. But this tutorial is done using the Cricut Explore Air 2. It integrates with Cricut Design Space to make projects like this one a breeze.
Pillow Covers
You can use any pillow covers you wish. I chose to use these 20 x 20 pillow covers that I got off of Amazon to use for my pillows. They are 100% polyester.
Pillow Inserts
Since I decided on 20 x 20 pillows, I made sure to order the same size pillow inserts for the covers.
Cricut Easy Press 2
You could also use an iron. But the beauty of the Cricut Easy Press 2 is that it does it better. Don't believe me? Check out my full review on the Easy Press 2, and you be the judge.
Cricut Easy Press Mat
This ensures that the heat is properly transferred.
Design Files
These are the files I created to make my designs
Iron-On Vinyl
I used the glitter vinyl. But there are several varieties and types of vinyl to choose from. The possibilities are truly endless.
How I Made My Throw Pillows using the Explore Air 2 & Easy Press 2
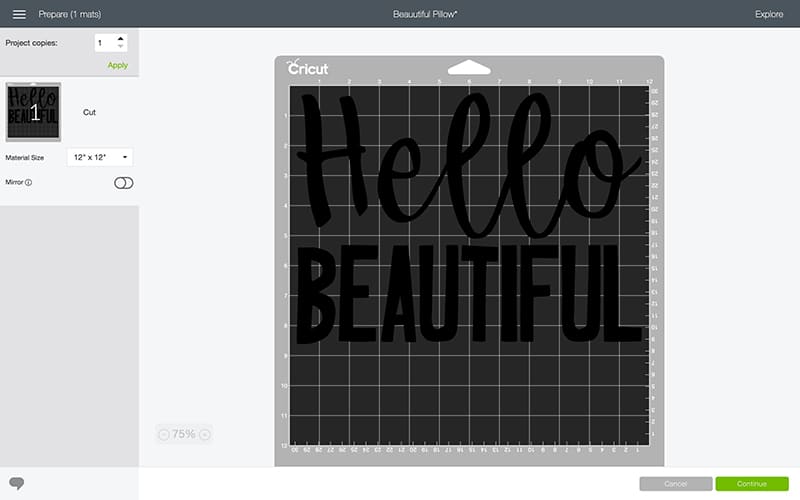
The Cut Files
I started out by creating my file in Design Space. But lucky you, I did all the hard work and heavy lifting for you. If you want to make this same design, you can just head over here and get the files.
After the file was made I went through the steps to “Make it”.

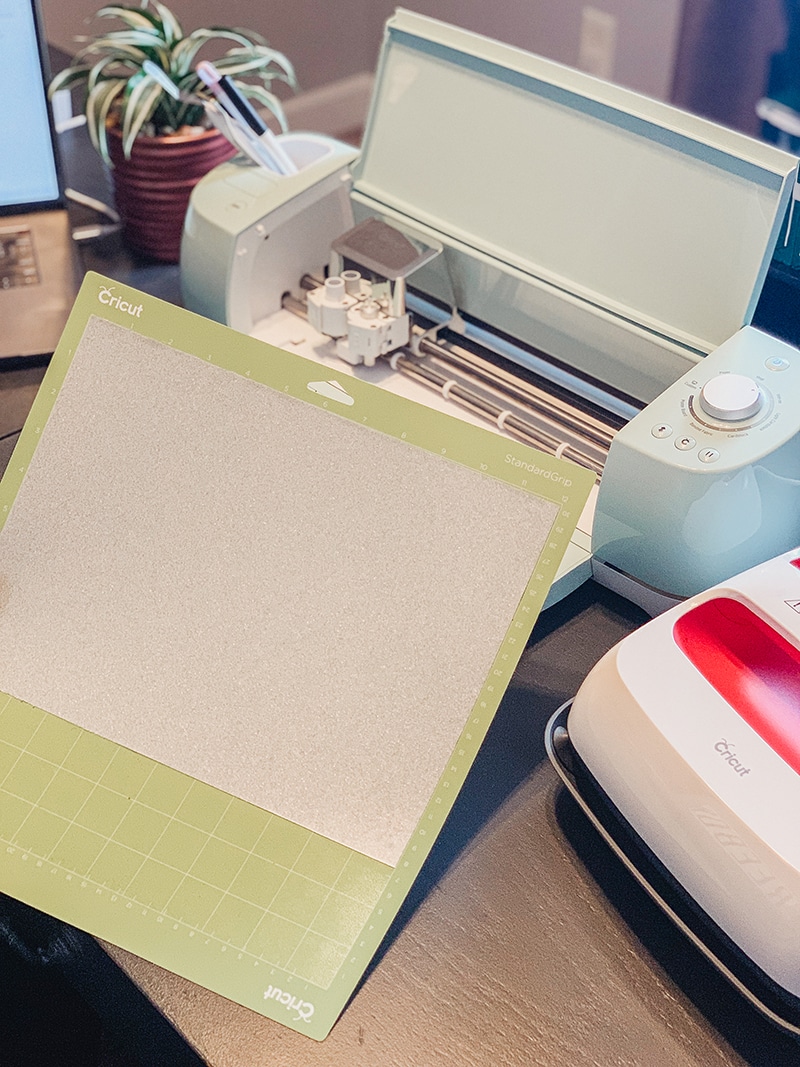
I cut my iron-on vinyl using the Cricut Portable Trimmer.
Then I placed the vinyl on the Cricut mat. I used the standard one because the vinyl is fairly thick.
Important note
The vinyl needs to be put on the mat face down. Otherwise, your design won’t come out as intended. I know because I printed mine the wrong way the first time. Don't be like me.
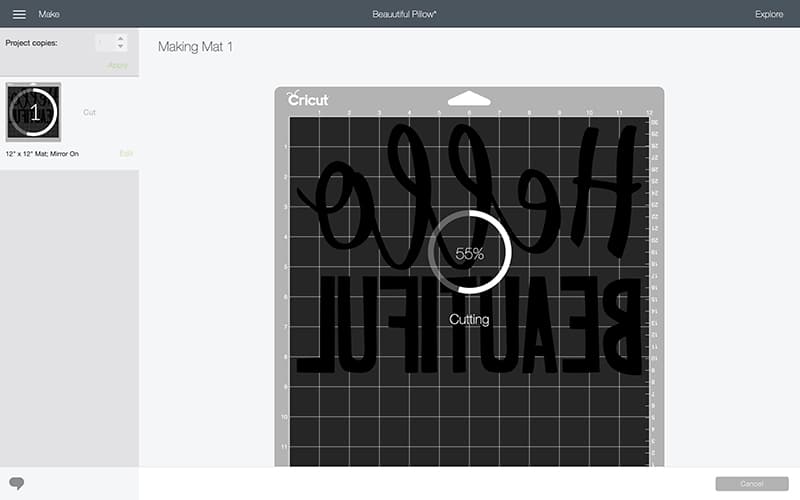
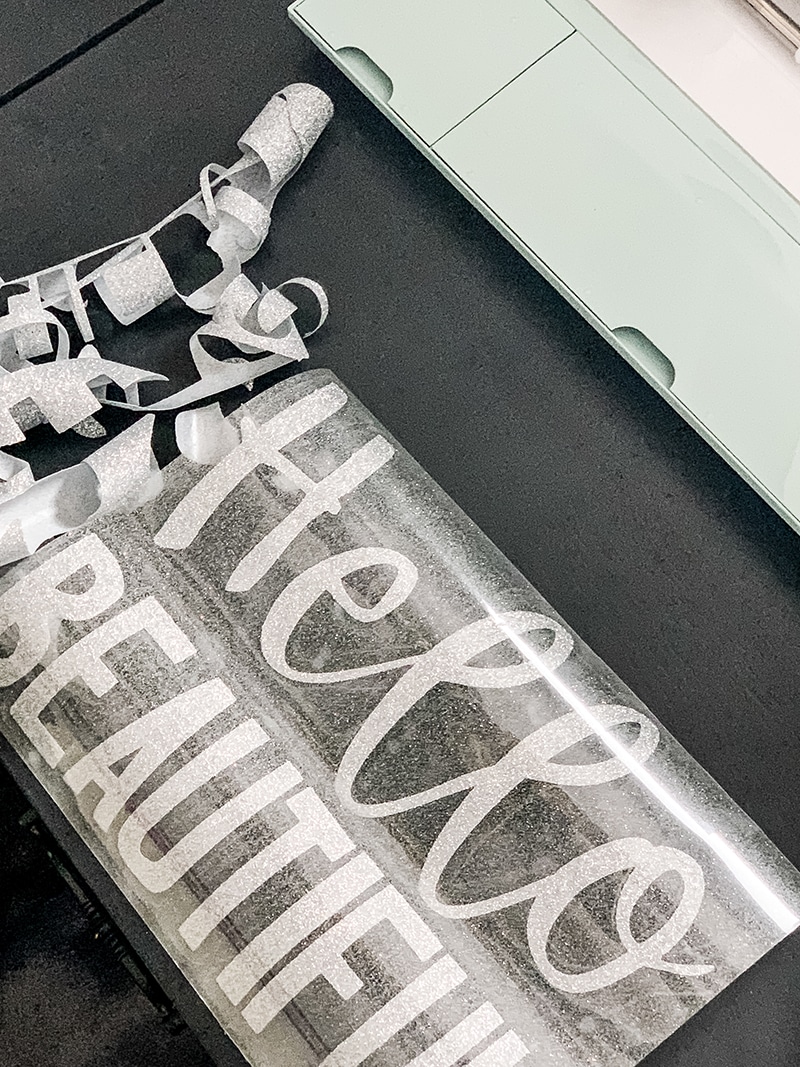
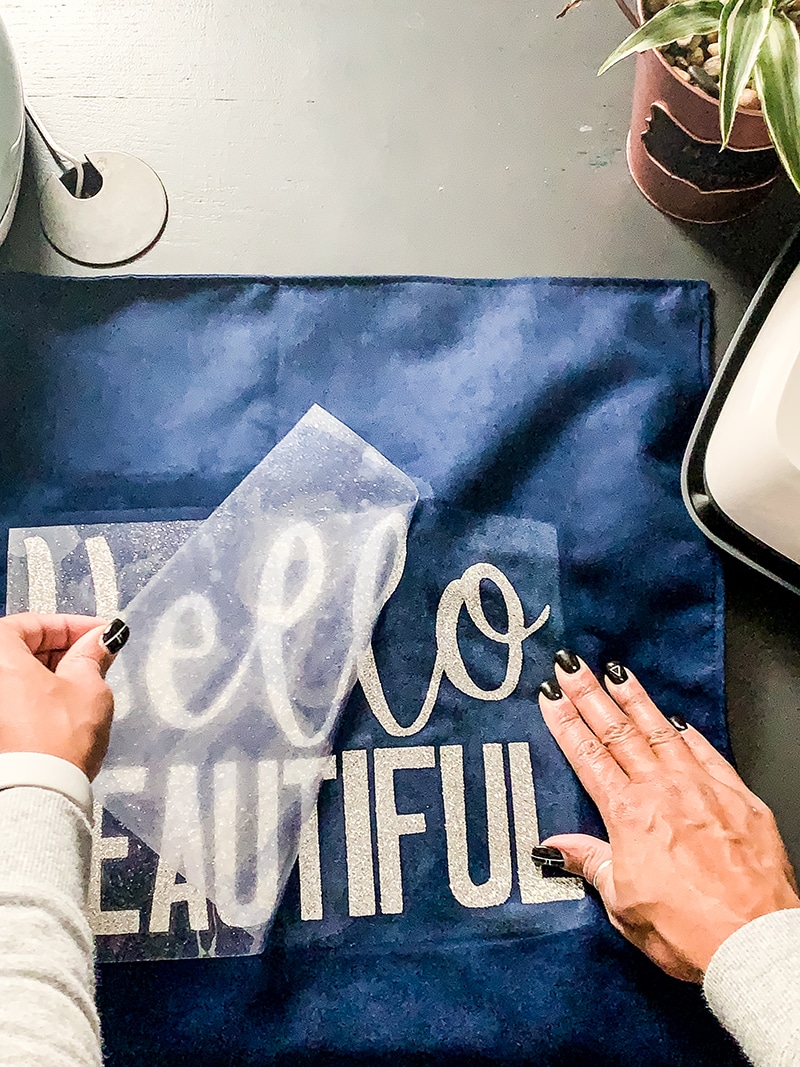
Once the machine has completed cutting, in my novice unknowing, I released the mat and peeled the vinyl from the mat to start weeding. I now know that it is better, and most importantly, easier, to leave it on the mat while you weed. Lesson learned.
Weeding is the process of removing the extra vinyl to prep it for ironing using the weeding tools. This leaves behind just the letters or design you want to iron on.
It took a minute to find my rhythm with weeding but once I got it, it was much easier.
Ironing on the design using the Easy Press
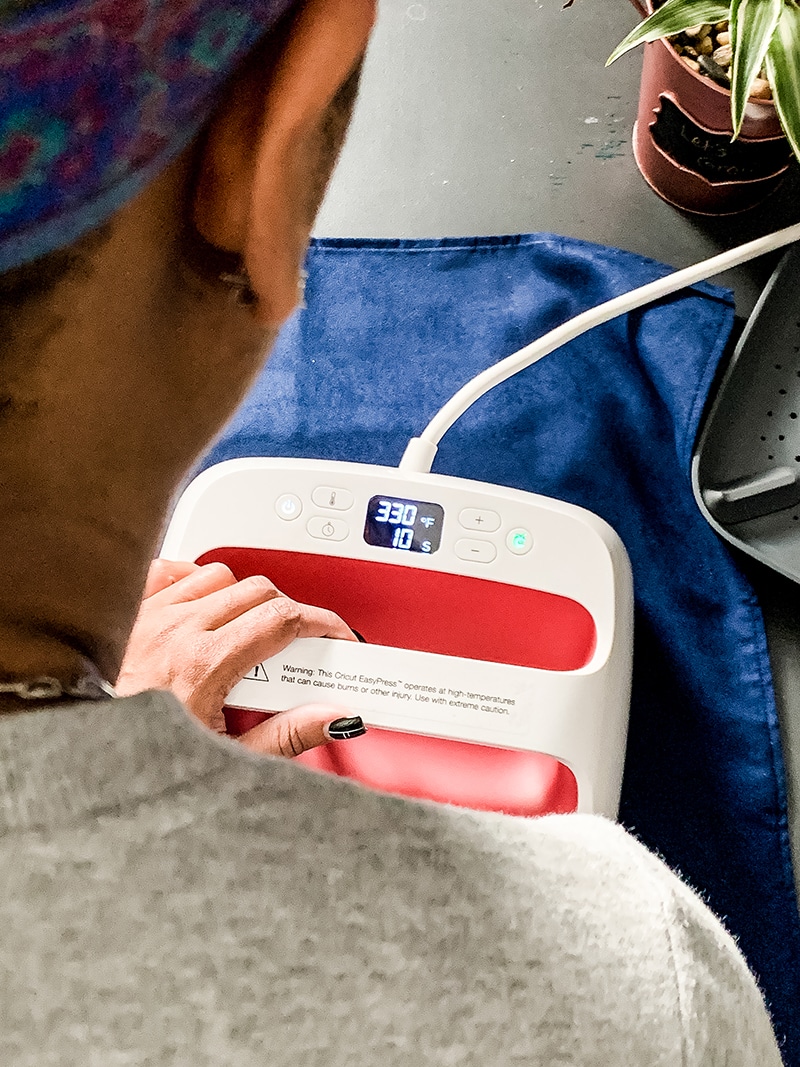
I started by warming up my Easy Press. The Easy Press 2 comes in four different sizes – the mini, the 6 x 7, the 9 x 9, and the 12 x 10 . I have the 9 x 9 size but I see the 12 x 10 in my future.
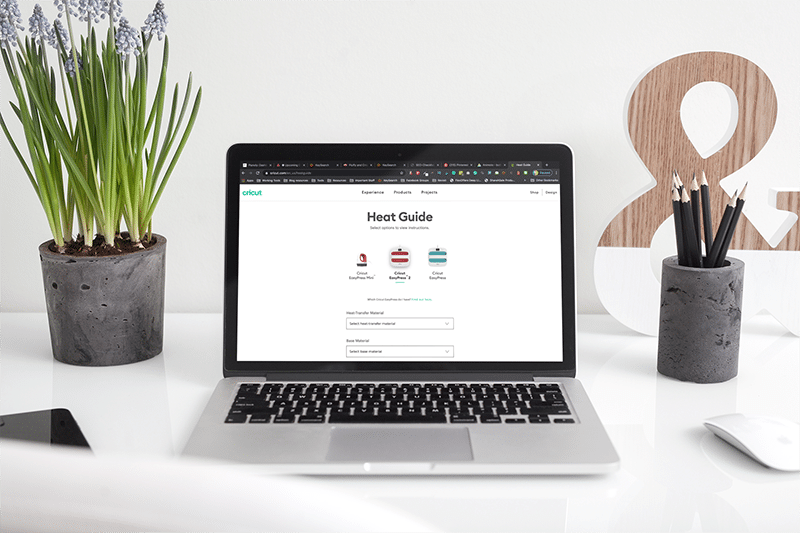
I looked up the temperature and time settings on the Easy Press Heat Guide. For the polyester pillow cover and iron on glitter vinyl, the temperature is 330 degrees.
After setting the temperature it only takes a matter of minutes before it is warm. In addition to the dial showing the temperature climbing, it beeps to alert you that it has reached the set temperature.
I placed the Easy Press mat on a flat surface and placed the pillow cover on top of it. I then put the easy press on the pillow cover for a few seconds to flatten and iron out the material before transferring the vinyl.
From there, I placed the design on the desired spot of the pillow. And because it was wider than the Easy Press, I did each part for the set time – 30 seconds.
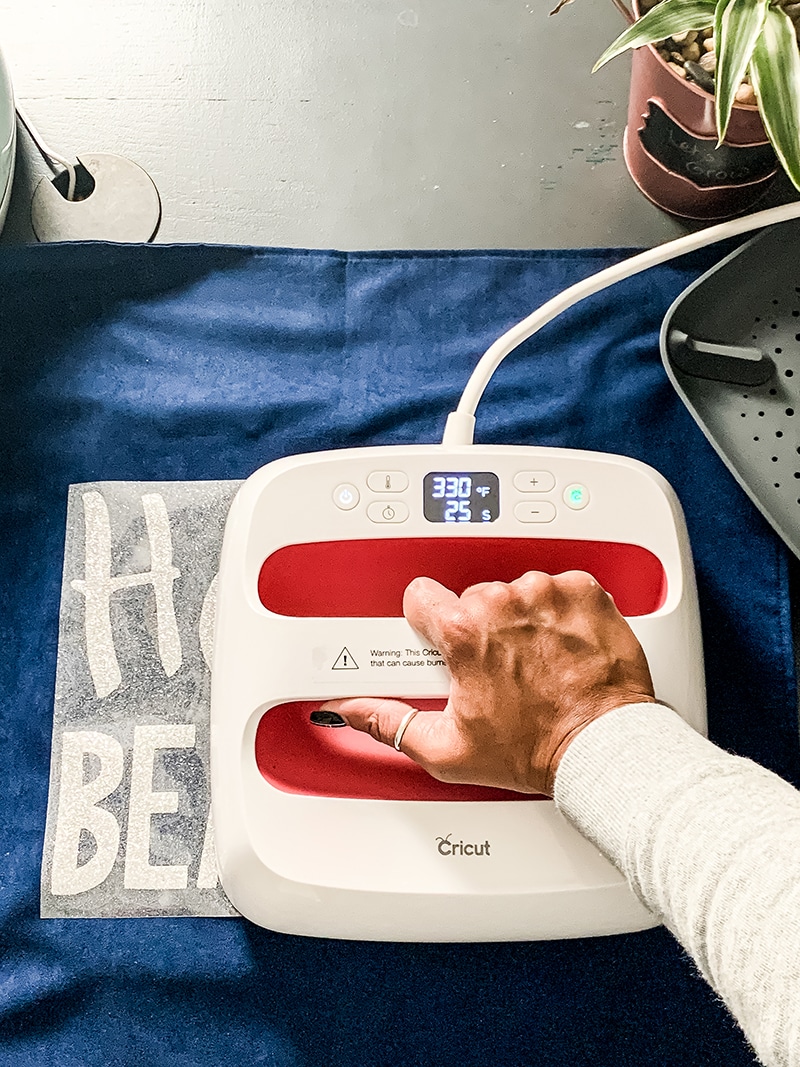
The timer makes this part impossible to mess up.
After doing the full iron-on, I flipped over the pillowcase and did the back of it for 15 seconds. Broken up into to 2 sections just like on the front.
The heat guide recommended a warm removal of the plastic. So I let it cool for a few seconds and then peeled back the plastic.
I stuffed with the pillow inserts and just like that – voila – new bedroom throw pillows!
DIY Iron On Throw Pillow Design Using The Cricut Explore Air 2 & EasyPress 2
An simple + easy DIY Iron On Pillow project using the Explore Air 2 and the Easy Press 2 from Cricut.
Materials
Tools
- Cricut Design Space
- Cricut Machine ( I used the Explore Air 2)
- Cricut Easy Press 2
- Design Files
- Cutting Mat
- Weeding tools
Optional Items
Instructions
- Open files in Design Space. These are linked above for you so you do not have to create your own unless you want to.
- Select "make it" in Design Space.
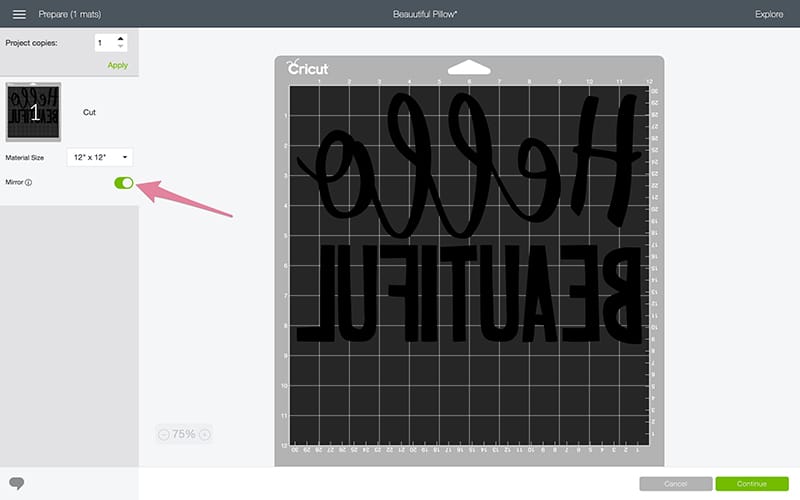
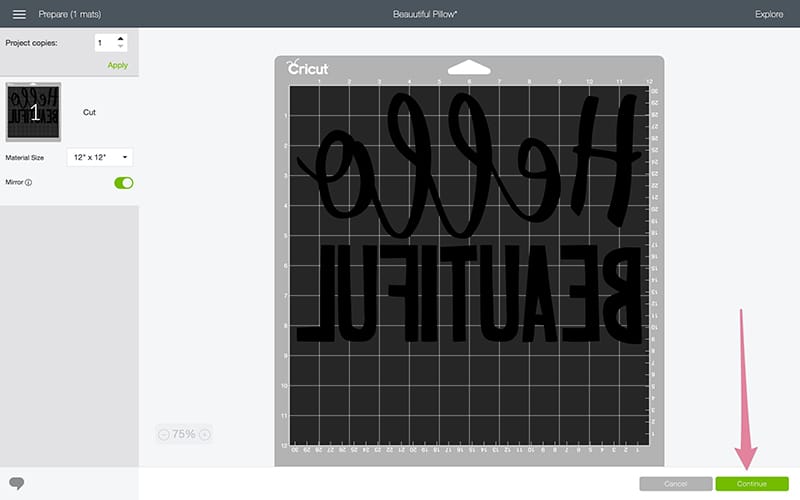
- Choose the 'mirror' option to ensure proper printing.
- Click 'continue' to set the mat for printing.
- Cut the proper needed amount of vinyl for the design. You can do this using the portable trimmer, or scissors if you don't have one.
- Place the vinyl on the Cricut mat. The standard one at a minimum because the vinyl is fairly thick. The vinyl needs to be put on the mat face down (shiny side down). Otherwise, your design won’t come out as intended.
- Once the machine has completed cutting, release the mat, peel the vinyl from the mat, and start weeding your design using your weeding tools.
- Warm up the Easy Press.
- Place the Easy Press mat on a flat surface and place the pillow cover on top of it. Then put the Easy Press on the pillow cover for a few seconds (about 5) to flatten and iron out the material before transferring the vinyl.
- Place the design on the desired spot of the pillow.
- Place the Easy Press on top of the design and press the start button so that it can count down. Because of the size of the design, if you have the 9 x 9 Easy Press like me, you will need to heat it in two separate sections. Making sure not to overlap.
- Flip over the pillow cover and do the back of it for 15 seconds. Broken up into to 2 sections just like on the front.
- Let it cool for a few seconds and then peel back the plastic.
- Stuff with the pillow inserts and enjoy your new beautiful pillows!
2 Comments